How to Build with AAC Blocks: A Step-by-Step Guide
Introduction
Autoclaved Aerated Concrete (AAC) blocks are transforming the construction industry with their numerous advantages. This step-by-step guide will walk you through the process of building with AAC blocks, ensuring you can leverage their benefits for your next project.
Step 1: Planning and Design
Before starting construction, detailed planning and design are essential. Consider the layout, load-bearing walls, and other structural elements. Consult with an architect or engineer to ensure the design incorporates the benefits of AAC blocks effectively.
Step 2: Foundation Preparation
A strong foundation is crucial for any building. Prepare the site by leveling the ground and setting up the foundation according to your design plans. Ensure the foundation can support the lightweight nature of AAC blocks.
Step 3: Mixing Mortar
Mix a thin-bed mortar specially designed for AAC blocks. This mortar provides a strong bond and ensures minimal joint thickness, enhancing the thermal and sound insulation properties of the walls.
Step 4: Laying the First Course
Start by laying the first course of AAC blocks on a damp proof course (DPC) to prevent moisture rise. Ensure the blocks are level and aligned correctly, as this will impact the entire structure's stability.
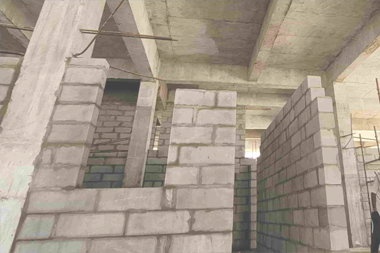
Step 5: Constructing Walls
Continue laying the AAC blocks, applying a thin layer of mortar between each course. Use a spirit level to check for level and plumb regularly. For corners and openings, cut the blocks to the required size using a saw designed for AAC material.
Step 6: Reinforcement
For added strength, reinforce the walls with steel bars or mesh at regular intervals and around openings such as windows and doors. This step is crucial for taller structures or buildings in seismic zones.
Step 7: Electrical and Plumbing Installations
Install electrical conduits and plumbing lines by cutting grooves into the AAC blocks. The lightweight and porous nature of AAC blocks make this process easier compared to traditional bricks.
Step 8: Finishing
Once the walls are up, apply plaster or other finishes as desired. AAC blocks provide an excellent base for various finishing materials, ensuring a smooth and durable surface.
Step 9: Roofing
Complete the structure by installing the roof. Ensure it is designed to handle the load and integrates well with the AAC block walls.
Conclusion
Building with AAC blocks is a straightforward process that offers numerous benefits over traditional construction methods. By following these steps, you can ensure a strong, efficient, and sustainable building that leverages the full potential of AAC blocks. Whether you're a professional builder or a DIY enthusiast, AAC blocks provide a modern solution for all your construction nee